Hand Embroidery - Ideas for upcycling any outfit
Upcycling has long history in Indian households, I remember how mom used to buy clothes for me on Diwali, just once a year! And other times it was either me wearing hand-me-downs from my siblings, or wearing dresses made from mom’s old sarees. And sometimes mom takes clothes to the Rafoogar to get them mended. All of this would leave me rolling my eyes at mom. But today, I understand her. She had lots of ideas for upcycling things even before it was popular! Maybe the reasons for upcycling have changed from economizing to reducing waste but the methods have remained the same.
So, What is upcycling?
Upcycling is a term used in various contexts. With respect to textiles, it means creatively repurposing old and new textiles to reduce wastage and pollution.
Ideas for upcycling clothes and fabrics?
Following are the ideas for upcycling a garment in various ways.
- Dyeing clothes
- Painting on clothes
- Add patches or beads to redecorate clothes.
- Turning scarps of fabrics into scrunchies or pouches.
- Hand Embroidery on fabrics.
- Redesigning clothes. Eg. - such cutting up your jeans into shorts, making kurtas from old sarees, etc. The only limit is your imagination! If you are wondering where to start, we have this detailed DIY tutorial about Patch Embroidery to help you start off.
What is Hand Embroidery?
Hand Embroidery is basically a method used to patch up a tear or maybe a stain with an embroidered design. If you are wondering how skilled of an artist you need to be, know this – anyone with a beginner’s level skill at handling a needle and thread can take up this fun project!
For this project we are using a hand embroidery design as a patch for a pair of jeans. You can choose your own material and design.
Materials Needed for the hand embroidery DIY project.
PRODUCT TO UPCYCLE.
- The fabric that you want to patch
- Needle
- Thread
- Thread Cutter
- Embroidery Frame
- Hand embroidery design
- Tracing Paper
- Water Erasable Pen

Before stitching, there are some things that you should be aware about.
- Decide the colour scheme of your hand embroidery design in advance.
- There are various types of hand embroidery stitches.
Choose Your - Colour Scheme

You can use any of those based on your skill level and preference.
- Stem stitch
- Chain stitch
- Back stitch
- Satin stitch
- Herringbone stitch
- Fishbone stitch
- Buttonhole stitch

*If you are a beginner, choose a design that is easy to work with. Also keep in mind the hand embroidery stitches that you would like to use in the design.
PROCESS
1. Choose a design.

2. Take the printout of your design keeping in mind the size of the patch.

3. Trace your design on a tracing paper.

4. Make holes on the tracing(khakha) paper using a pin such that the holes trace the design.

5. Draw the design from paper (khakha) to fabric using a water erasable pen. The holes traced will help you print the design on the fabric.
6. Stitch the traced design.
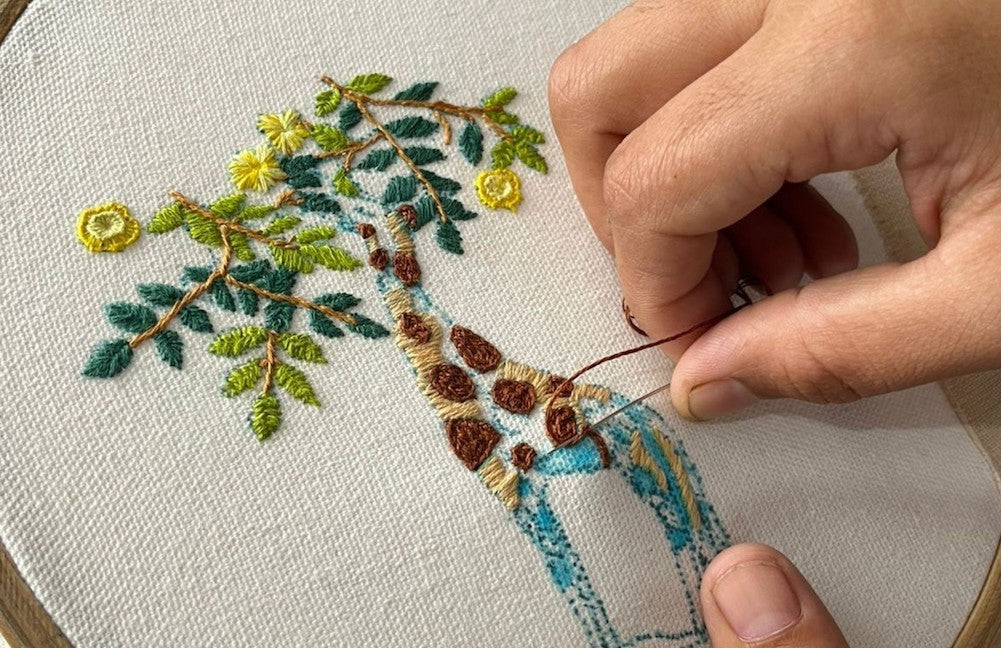
Motif in process :

We have used
- Satin, herringbone and fishbone for leaves.


- Buttonhole & satin for flowers

- Chain stitch, back stitch and Kantha stitch to fill the patch area of the giraffe.
7. After you are satisfied with the hand embroidery pattern apply reversible fusing to the design.

8. Cut the hand-embroidered design and secure the boundaries with fabric glue or blanket stitch.

Patch wherever you want to!

Now, all you have to do is flaunt that cool hand embroidery design!!

